
And How to Make Your Own Natural Soy Candle at Home
I recently attended a candle-making course, and it quietly changed the way I think about scent in the home.
We worked exclusively with soy wax and essential oils — no paraffin, no synthetic fragrance oils, no shortcuts. And the difference was immediate. The scent was softer. Cleaner. Less aggressive. It didn’t cling to the back of your throat or linger in a way that felt overwhelming.
It made me realise how accustomed we’ve become to inhaling things that aren’t particularly kind to us.
Many mass-produced candles are made with paraffin wax and synthetic fragrances, which release volatile organic compounds when burned. We light them to relax, to unwind — yet they often do the opposite on a physiological level.
Making candles this way felt slower, more thoughtful. You’re choosing oils for how they make you feel, not how loudly they announce themselves in a room. The vessel I used was a small locally made jesmonite pot — something that felt like it belonged in the home rather than something mass-produced and disposable.
Like so much of homemaking, this was less about the end product and more about the process — slowing down, understanding what we bring into our homes, and choosing better when we can.
Why It Matters What Your Candle Is Made Of
I’m not suggesting everyone throw away every candle they own. But it’s worth understanding what’s in them.
- Paraffin wax is a petroleum byproduct. When burned, it can release compounds including toluene and benzene — the same chemicals found in diesel fumes.
- Synthetic fragrance oils can contain hundreds of undisclosed chemicals. ‘Fragrance’ on an ingredients list is a catch-all term that tells you very little.
- Soy wax burns cleaner, slower, and cooler than paraffin. It’s also biodegradable and easy to clean up with soap and water.
- Essential oils used at the right concentration give a genuine, natural scent — and many carry therapeutic properties too.
- Wood wicks give a gentle crackle when lit — a small sensory detail that makes the whole experience feel more intentional. They also tend to burn more evenly than cotton wicks.
Once you experience the difference, it’s hard not to be more discerning.
How to Make Your Own Natural Soy Candle
This is the method I learned on the course, adapted for making at home. It’s simpler than it sounds and genuinely satisfying to do.
What You’ll Need
- Soy wax pellets (enough to fill your vessel roughly twice over — the wax reduces as it melts)
- A wood wick with a metal sustainer tab
- A small glass jar, jesmonite pot, or heat-safe vessel
- A double boiler or heatproof bowl over a saucepan
- A thermometer
- Essential oils of your choice (see scent blend below)
- A wooden skewer or pencil to hold the wick centred while the wax sets
My Scent Blend
I used a blend of five essential oils, layered to create a balanced, natural scent. A good candle fragrance blend works in three layers:
- Top notes (the first scent you smell, light and fresh)
- Mid notes (the heart of the fragrance — I used jasmine here)
- Base notes (the warmth that lingers as the candle burns)
As a general guide, use approximately 6–10% fragrance load by weight of wax — so for every 100g of soy wax, you’d use around 6–10ml of essential oils in total.
Method
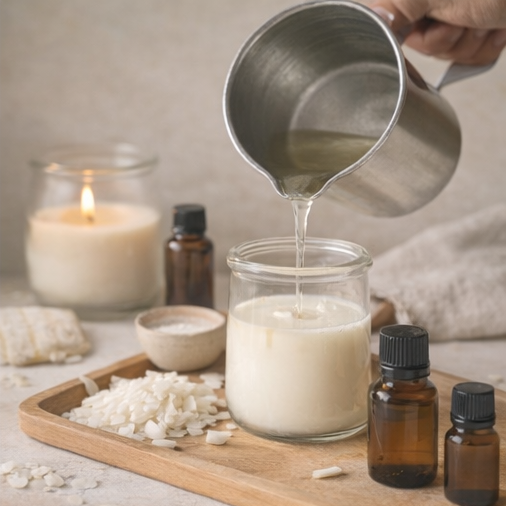
- Secure your wood wick in the metal sustainer tab and place it centred in your vessel. Rest a wooden skewer or pencil across the top of the jar with the wick threaded through to hold it upright.
- Melt your soy wax pellets gently using a double boiler, stirring slowly. Do not overheat — aim for around 70–75°C.
- Remove from heat and allow to cool slightly to around 60–65°C before adding your essential oils. Adding oils when the wax is too hot will cause them to evaporate and you’ll lose the scent.
- Stir the oils in slowly and thoroughly for about two minutes to ensure they’re evenly distributed.
- Pour carefully into your prepared vessel, keeping the wick centred. Pour slowly to avoid air bubbles.
- Leave to set at room temperature for at least 24 hours. Do not move or disturb the candle while it’s setting.
- Once fully set, trim the wood wick to about 5mm before the first burn. Allow the candle to cure for 48 hours before lighting for the best scent throw.
A Few Things Worth Knowing
- First burn matters: Always allow the wax to melt all the way to the edge of the vessel on the first burn. This sets the ‘memory’ of the candle and prevents tunnelling.
- Keep burns to 3–4 hours: Longer than this and the wick can start to mushroom and the vessel gets too hot.
- Soy wax can look uneven on top: This is completely normal and doesn’t affect how the candle burns. It’s a sign of a natural wax.
- Vessels: Saved glass jars work beautifully. Clean out an old candle jar, remove the old wax with boiling water, and it’s ready to use again.
The Beginning of Something
Candle making is something I’ll be coming back to on Modern Homemaking. There’s so much to explore — seasonal scent blends, gifting ideas, different vessels and waxes. This post is very much the beginning.
But even if you never make your own, I hope this changes how you look at the candles you buy. A little more curiosity about what’s in them, and a little more intention about what you bring into your home.
That, to me, is what the heart of the home is all about.
— Harper
Leave a Reply